Showing posts with label Equipment. Show all posts

Friday, November 9, 2012

How I built my kegerator out of a 25 cu. ft. upright freezer (aka keezer)

I have wanted a kegerator for years, long before I began brewing beer. After I had gotten a solid feel for brewing, I decided it was time to get a force-carbonation setup and build a kegerator. At first, I began looking for mini-fridges, but I really wanted to build a setup that could take 4 Cornelius kegs (5-gallon) and a CO2 tank. I could not find a decently priced, used mini-fridge that could fit all of it. I happened across a 25 cu. ft. commercial freezer on Craigslist for a great price, so I bought it. With this size, I will be able to fit up to 7 kegs and a 10 lb. CO2 tank. The initial setup is quite costly, so I only installed one tap to start, but I have a 4-way gas manifold which allowed me to expand to 4 taps over time.


First, I cut out the three bottom shelves in the door to allow more room for the kegs. I used a cordless electric handsaw to cut out the shelves, and then I used some plant-based spray-on foam insulation (picked up at my local hardware store) to fill the gaping holes that remained. After that, I cut off the excess foam insulation and then sanded it down.


I retained the top few shelves for storing glasses. I went to Goodwill and picked up both pint and liter glasses. It's good to have options!


I bought a Perlick 525 Stainless Steel faucet, which I am super satisfied with. These faucets are forward-sealing, so they are easier to clean and less likely to harbor bacteria. I purchased these shanks from MoreBeer.com, and they were the perfect size for the freezer door.


Installing the faucet was rather easy: I simply used a 1" hole saw to bore a hole through the freezer door, then I slid the shank in and tightened it down and installed the tap.


I bought an Eva-Dry e500 dehumidifier for the freezer, which has proven to be a great investment. I'd highly recommend getting one, should you decide to build a kegerator. It has a 10 year life span and you can recharge it by simply plugging it into a wall outlet for an hour. You can see it positioned behind my 4-way CO2 manifold in the picture to the right.


To keep the freezer's temperature sitting at 40*F (which I have found to be the sweet spot for kegged beer), I installed a Johnson Controls analog temperature controller. This controller is great because it is accurate and it does not require any electrical rewiring.


Here you can see the whole setup. I've got the CO2 tank connected to a dual-gauge CO2 regulator, which feeds into the 4-way gas manifold, which then charges the kegs. The keg on the right is connected to the faucet, and you can see how I have all of the beer line coiled around the top of the keg. Even after "balancing" my system, I was initially having foaming problems. After asking around on some forums, I was advised to use 10 feet of beer line instead of the 5 feet I was using. I simply coil all of the slack around the top of the keg, and now I have no more foaming problems!
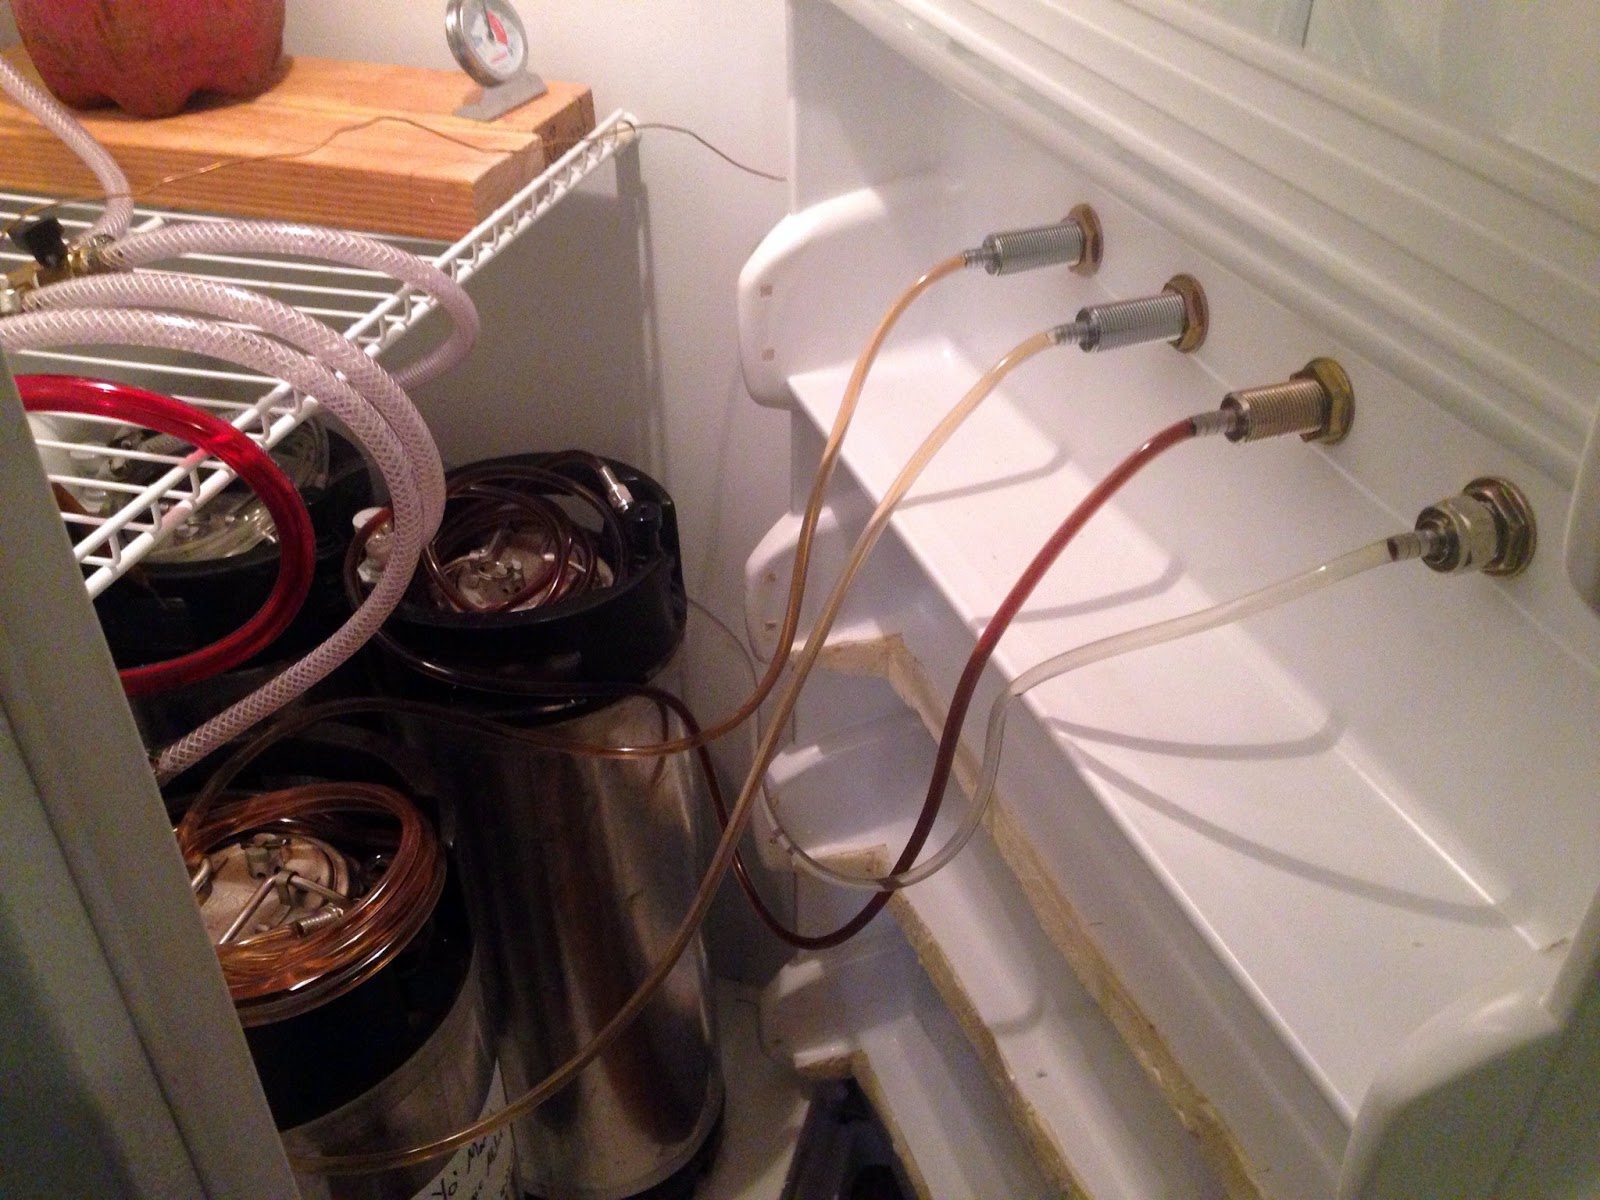


Here's a view of the inside of the door with 4 taps hooked up:


Want a kegerator, but don't want to go through the effort of building one? Then check out these links:

Sunday, September 2, 2012

How to build your own beer line cleaning system! It's inexpensive and easy!

I have a hard time with the idea of having an extra keg around just to clean my kegerator beer lines;  I knew there had to be a better way. After some research, I came across this awesome DIY beer line cleaning system at the Homebrewers Association's "Pimp My Rig" page (original link here), so I decided to build it. I have detailed the process below with pictures. This system only cost me about $21, which is a lot less than the $45-60 pre-made systems that you can purchase at your local brew store. I purchased everything at Home Depot, except for the Firestone ball-lock liquid post, which I got from my local brew store. To build this system, you will need:
  • Flo-Master 56HD Hand Pump Sprayer ($6.97)
  • Watts A-176 3/8 Flare to 3/8 FIP coupling ($2.80)
  • Teflon pipe tape ($1.18) - for a great video on how to use teflon tape, click here
  • Firestone ball-lock liquid post ($10.00). It is very important you get a Firestone post, or else the threading wont be the right size.
1) First, you need to unscrew the green nozzle on the end of the sprayer:
2) Next, you need to wrap the male threaded end of the sprayer with around 8-10 layers of teflon tape. Be sure to wrap the tape in the same direction that you'd screw something onto it! Otherwise, the tape will loosen when you screw on the next fitting.
3) Screw the coupling onto the newly taped nozzle:
4) Now, tape the end of the coupling with 8-10 layers of teflon tape as well (we want to be sure that the unit will be completely water-tight):
5) Screw on the Firestone quick disconnect:
6) Viola! You now have your beer line cleaning pump!
7) Simply fill the Flo-Master with warm water, cleaning solution, or sanitizer, and then connect the cleaning pump to your beer line:

8) Pump the Flo-Master up to pressurize the container


9) Open the tap and let the cleaning solution run through the system!

10) Repeat as necessary with other lines!

Tuesday, August 21, 2012

How to Disassemble and Clean a Corny Keg

I just got a few Cornelius Kegs for the kegerator that I am building (be on the lookout for more info!), and I found this great video on how to disassemble and clean a corny keg. Also, it has some general information on the anatomy of a quick disconnect (ball-lock) system. Enjoy!


Wednesday, May 9, 2012

15-gallon mash/lauter tun cooler system with HLT

Today, I received my new all-grain mash/lauter tun system from the guys at homebrewstuff.com. It is a 15 gallon system, so it is possible to do very high gravity brews, such as barley wines. The awesome thing is that the price these guys charge (including shipping and handling) only costs about $10 more than if I were to buy everything and build it myself! The mash tun has a sparge ring built into the lid that is fed by the HLT(see pic below), so performing a continuous sparge is super easy! I've still got ingredients for one more extract brew, but once that's all done with, I'll be able to start using this system!

The tube on the left feeds into the
wort pot.
Side profile of the system.
The HLT feeds the mash tun and
the flow is easily regulated through
a valve system
Inside the mash tun